Laminate Countertop Update
Imagine having a magic wand that could instantly erase decades of scratches, stains, and chips from your laminate countertops? Well, I don’t have a wand, but I do have a paint brush, and that’s basically the same thing!
I gave these nearly 40 year old counters a fabulously frugal facelift using Rust-Oleum’s Countertop Transformations Kit in Mica White, and although the colour didn’t change, I essentially erased decades of wear and tear in only two days.
Watch my video tutorial by clicking HERE!
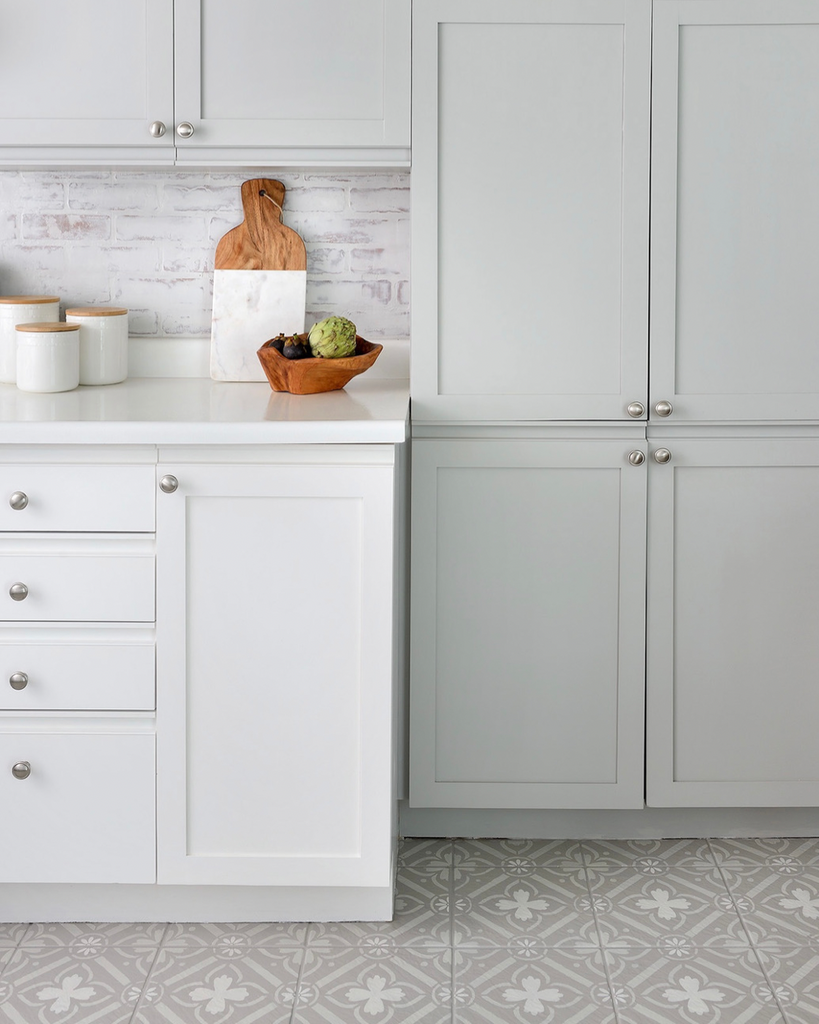
Before

After

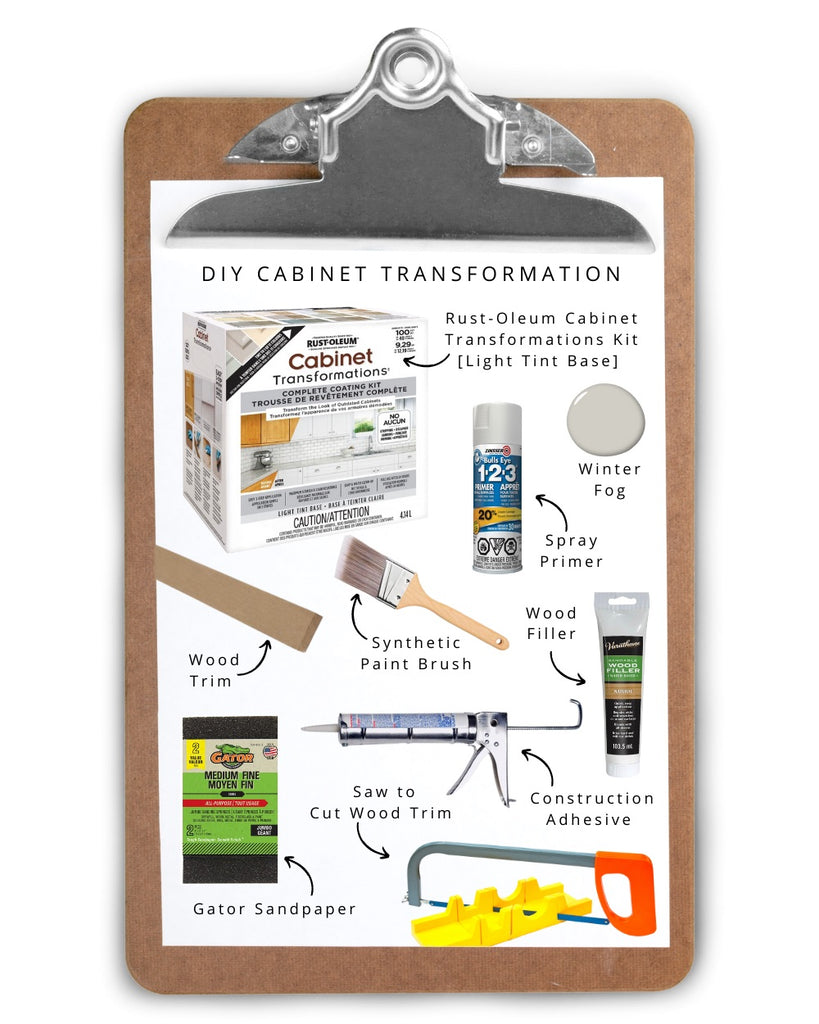
The kit is available in black and white and comes with the rollers, sanding tools, the base coat, and the protective Mica top coat that creates a beautiful shimmery look of natural stone. Here’s what’s included:
- Diamond embedded sanding tool
- 10mm nap roller
- 6mm velour roller
- Base Coat
- 2-Part Protective Top Coat
- Stir Sticks
- Instruction Booklet

Additional painting materials required:
- Krud Kutter Cleaner | Degreaser
- Varathane Classic Wood Filler
- Gator medium/ fine grit sanding sponge
- Drop cloth
- Disposable gloves
- Lint-free rags
- 6” Roller frame
- Paint tray
- Painter’s tape
- Dust mask
- Protective eyewear
- Metal putty knife

How-To Instructions
1. Clean & Prep
- Spray all surfaces with Krud Kutter Cleaner | Degreaser and wipe clean with a lint-free rag

- Using a clean metal putty knife, scrape and remove all caulking from abound the sink, backsplash, and wherever the counter edge may meet cabinets or walls

- If there are chips, cracks, or open seams, apply Varathane Classic Wood Filler using a putty knife, and once dry, sand smooth with a Gator med/ fine grit sanding sponge


- Wearing a dust mask and gloves, thoroughly sand the entire countertop surface using the diamond-embedded sanding block included in the kit. Pay close attention to the backsplash lip and front edge, and be especially careful around the sink and any other areas that could scratch easily


- Use a vacuum with hose attachment to remove dust on counter surface and then wipe down countertops with a damp, lint-free cloth. Once dry, rub your clean, bare hand on the surface to check for any remaining dust. Repeat if necessary

- Carefully inspect the surface in good lighting to ensure that the entire surface is de-glossed and sanded
- Mask off the sink, appliances, and all adjacent walls and cabinets with painter’s tape, and then attached plastic drop cloths to cover the lower cabinets as well as on the floor

2. Apply Base Coat
Once the countertops have been cleaned and prepped, you will apply two even coats of the Base Coat, two house apart.
- Thoroughly stir the can of Base Coat with the stir sticks included in the kit and pour a small amount into a paint tray

- Using a 2” synthetic paint brush, start at the backsplash by applying an even coat and be sure that the coverage includes 2-5cm of the flat counter surface that connects to the backsplash. This will prevent the roller from accidentally bumping into the backsplash while rolling


- Working from back-to-front, use the 10mm roller in the kit to apply and even base coat over the entire countertop, then use the brush again to coat any tight spaces (ie. around the sink or in corners)

TIP: Hold the roller at a high angle when rolling for a smoother application!
- After the first coat has been applied, quickly inspect the surface for sag or thin coverage and apply more base coat where necessary
- Allow to dry to the touch for approximately 2 hours and then apply a second coat
- Let the base coat dry overnight before applying the Protective Top Coat
3. Apply Protective Top Coat
This final step will create a beautiful, long lasting, and protective finish that includes a Mica fleck to give your countertops a high gloss shimmer.
- Inspect counters and remove any dust that may have settled overnight by wiping the surface with a damp lint-free cloth
- Wearing gloves and safety glasses, pour Part A Activator into Part B Base and thoroughly mix with a stir stick for at least 2 minutes, then pour a portion into a clean paint tray

- Using a 2” synthetic paint brush, apply an even layer of the protective top coat to the backsplash and edges in the same manner that the base coat was applied

- Roll the top coat onto the surface from front-to-back using the velour roller included in the kit, and avoid overlapping roller marks, but pay close attention to the Mica flecks and ensure they are evenly distributed

- Allow the top coat to dry undisputed, and take all necessary steps to make sure it is not brushed up against or touched. Keep windows closed, pets away, and ceiling fans off
- The top coat will be tack free in 4-6 hours, and at that point, carefully remove all painter’s tape
- Allow to dry 48 hours until light use, and wait 7 days for full cure and to re-caulk around backsplash and sink
Next week, I’m transforming the backsplash, and I have a crafty idea that will hopefully create BIG impact on a very small budget! And my #KitchenMakeoverTakeover grand reveal is just a few weeks away, so stay tuned… EEEEK!!!